Thursday, January 29, 2009

Banana Chocolate Chips with Almond & Chocolate Rice Cake

Today i decided to bake banana cake for my family; they love banana cake. Since i didnt have any ripe bananas at home today, i went out to do some grocery shoppin and also i bought myself a cute pretty lil plate. I was a lil worried bout how the cake would turn out for the previous Peanut Butter cupcake didnt turn out very well. It was edible but not like how i'd wanted the texture to feels like when i bite into it. 

I didnt want to bake a plain banana cake so i decided to add a lil twist to it; chocolate chips with almond and chocolate rice as the toppings.

So i went about searchin for the banana cake recipe; found one but as i was mixing all the ingredients together, i kinda fine-tuned it a lil. Here's the revised recipe :

INGREDIENTS:

1 3/4 cups all-purpose flour
3/4 cup sugar
1 tsp baking powder
1 tsp baking soda
1/2 tsp salt
1 egg
1/2 cup corn oil
1/2 cup of plain yogurt ( i used the whole yogurt cup; 140g)
1 tsp vanilla essence
1 cup mashed ripe bananas ( i used 5 small ripe bananas)
2/4 cup chocolate chips
1/4 cup milk

TOPPING:
1/4 - 2/4 cup of sliced almonds
1/8 cup of chocolate chips

METHODS:

1) In a large bowl, combine the flour, sugar, baking powder, baking soda and salt.
2) Combine the egg, oil, yogurt and vanilla in another bowl .
3) Stir into dry ingredients just until moistened.
4) Fold in bananas and chocolate chips.
5) Grease the non-stick bakeware.
6) Pour the batter and top it up with almond slices and chocolate rice.
7) Bake at 177 degrees C for 30 minutes or until a toothpick comes out clean. 

And here's the end result of my Banana Chocolate Chips with Almond & Chocolate Rice cake and my newly bought cute lil pretty plate :)


Monday, January 26, 2009

Reunion Dinner Feast

Usually for the Chinese, reunion dinner means steamboat but as for my family, steamboat isnt really our thing or rather we dont own a steamboat pot so havin a steamboat's rather impossible. Back then when my grandpa and grandma ( my dad's side) was still alive, we'd travel bout 100km+/- for reunion dinner and since they are no longer with us, we dont have steamboat anymore.

Since a few years back, i've been the in-house chef to prepare food for the family prior the reunion dinner. I would say this year's dinner was the most grand i've prepared.

A week before the dinner, i actually asked my family members for opinions, ideas, suggestions on what to prepare or what they would like to have for reunion.

Bro being his sarcastic self answered duck and crab. Its not impossible to prepare those but the bro actually requested Peking Duck and since i've no experience with using duck to prepare a meal, i googled for recipes and so on and i saw a youtube like clip that showed the whole process of preparing Peking Duck and it takes bout 8 hours before you can start  feedin on it! Upon knowin that, bro decided it was too much hassle and requested that to check if we can get supply of crabs at our local seafood supplier. Dont know wht made him changed his mind, he decided that he didnt want anymore crabs.

At the end of the day, i'm still left with no suggestions. Then i thought i should do somethin really different this time. Somethin ive not done. Then I've no idea what came over me when i was plannin on the menu for the reunion, i came up with 6 dishes!

The 1st dish: Braised Sea-Cucumber & Mushrooms.

Ingredients:

Sea- cucumber
*
 young ginger
spring onion
* Shao Hsing Hua Tiau 
cut into big slanting pieces

Note: stir fry all ingredients to prepare the sea-cucumber

Mushrooms
*
medium-sized dried mushrooms,washed
* water
* oyster sauce
* light soy sauce
* sugar
* sesame oil

Note: simmer until mushrooms are soft and keep the remaining stock for later use

Ingredients for stir-frying & gravy :
* oil
* garlic
* young ginger
* Shao Hsing Hua Tiau
* oyster sauce
* light soy sauce
* thick soy sauce
* sugar
* salt
* chicken stock granules
* pepper
* sesame oil
* mushroom stock ( from simmering of the mushrooms)

The 2nd dish: Deep-Fried Crispy Seafood Tofu

Ingredients:

* japanese egg tofu
* soft beancurd
* salted egg yolks
* fish paste
* prawn paste
* spring onion
* chopped red chilli
* cornflour
* plain flour
* salt
* chicken stock granules
* pepper

Note: combine all ingredients and steam it in a tray until cook, remove, cut into strips or cubes then dust the steamed tofu with the combination of tapioca flour + rice flour and deep fry.

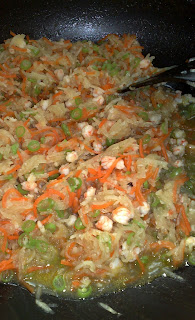
The 3rd dish: Sichuan Chili Prawns

Ingredients:

Marinade
* Shao Hsing Hua Tiau
* sesame oil
* finely minced garlic
* sugar


Note: marinade the prawns (deveined & shelled) for a few hours

Sauce
* sesame oil 
* salt
* sugar
* chili sauce
* tomato sauce
* corn flourNote: stir-fry the prawns and add in the sauce

The 4th dish : Sweet Pork

Ingredients:

* pork ribs
* brown sugar
* red shallots
* fish sauce
* sweet soy sauce (kecap manis)
* white pepper
* coriander leaves
* warm water


Note : dissolve brown sugar and water in a non-stick, add ribs and shallots, followed by fish sauce, sweet soy sauce, pepper and water and simmer it.

 The 5th dish : Stuffed Calamari

Ingredients:

Dipping Sauce
*
lime juice
* fish sauce
* brown sugar
* chopped red chili

Stuffing
*
fish paste (used dory fillet)
* prawn paste 
* finely chopped garlic
* fish sauce
* chopped coriander
* lime juice
* brown sugar

Note : prepare the stuffin and fill up the calamari about 3/4 full and secure with a toothpick. Rice flour to coat before pan-fryin.

The 6th dish : Steamed Seabass with Garlic & Lime

Ingredients:

* seabass
* chicken broth
* bird's eye chillies (finely sliced)
* lime juice
* fish sauce
* sugar


Note: You can prepare the gravy and the fish separately or you can steam everythin together.

Separately: Steam the fish with a few tablespoons on the chicken broth and simmer the remaining of chicken broth with the rest of the ingredients and when the fish is done, just pour the gravy over the fish.

Everythin together: Simmer the chicken broth and the rest of the ingredients together and when its done, pour it over the fish and steam the fish until its soft and tender.

So there you have it, my rather elaborated reunion dinner with the family. I gotta say i enjoyed every single bit the work involved in preparin it for my family! Wht's more satisfactory was that all the dishes was wiped out! The faces of my family members piggin out on the food was priceless.


Sunday, January 25, 2009

Stir-fry Dory Fillet

There were 4 big dory fillets in the fridge when i was treasure hunting wht to cook. I wasn't too keen on turnin those fillets into fish and chips so i thought why not experiment on it.

I didnt know exactly wht to prepare with it. So i was like just goin with my intuition. So i took a large piece of fillet out, cut it into bite size. 

Next i seasoned it with, salt, pepper, fish sauce and paprika. Let it marinade for 30mins or so, dependin on how much time you have before you need to start cookin. 

I glazed it non-stick with some marjerin and pan fried the bite -sized fillet. At first i wanted to dish out on the paper towl but then decided since its pretty wet n it somehow turned into a gravy like thing with the marjerin, so i left it in there n add some sliced red onions and continue stir-fryin.

Since it was definitely too dry, i started to add in plum sauce, tomato sauce, chilli sauce, sugar & salt to taste and before dishin it out i drizzled it with rice wine.

I can taste the paprika when i bite into it, and the fillet was soft and tender but lack the sweetness from the flesh of the fish, i wonder why. With a question in mind, this geek cook will wiki or google to find out the answer!

Friday, January 23, 2009

Meat Balls with Dip

I've left over mince which i bought earlier and i didnt want it to be sittin in my fridge for an extra day. I'd wanted to turn it into a meat patty but too bad i dont have any burger buns at home to go with so i decided to make meat balls with it. 

You can use any type of mince but bear in mind that different type of poultry will require different seasoning ingredients to make it tastier. I had minced lean pork seasoned with black pepper, light soy sauce, fish sauce, cayenne powder, cornflour and salt. Marinate it for a few hours. 

Shape the bowl of mince into balls and coat it with cornflour then dip it in the egg batter and finally breadcrumbs. You can shape the mince into balls batch by batch. When you've put the first batch for fryin, you can prepare the second batch n so forth till you finish the bowl of mince.

As for the dip, pound the garlic and shallots together and stir-fry it with butter and after that add in water, chili sauce, tomato puree, hot chili sauce and plum sauce. Sugar and salt to taste. Keep stirring the dip over a lower fire until it thickens. When its ready dish out.

Coconut Cake with Hidden Treasure

Previously i did an entry on Coconut Muffins and i wasn't too pleased with how the muffins turned out, especially the texture; wasnt as moist and fluffy as i wanted it. Due to that i was even more determined to try that recipe out again but this time around i added a twist in it. I've included chocolate chips in the batter.  

Instead of using the muffin cups i opted the rectangular non-stick bakeware i bought previously.

As for the batter, i used the same Coconut Muffins recipe but with a slight change. I've added more milk this time, bout 1/4 cup more and a lil bit more of the desiccated coconut in the batter.

Before pourin the batter into the bakeware, brush it with melted butter or marjerin, in my case, i used marjerin.  I baked it for bout 25mins.

I was pleasantly surprised and pleased by how the texture of the cake turned out! I thought 3rd's a charm but i suppose its not applicable in my case. I definitely cant wait to bake again!

Baking taught me so much more than just following the precision of ingredients used in the recipe. Patience is definitely a virtue in bakin and determination is another plus point in striving to achieve perfection. 

Wednesday, January 21, 2009

Coconutty Muffins

Baking with coconut was inspired by a friend. She being the coconut lover somehow kinda turned me into wanting to try experiment with the various aspect of coconut.

This is officially my 3rd time baking muffins and i gotta say im so totally into this baking thing right now. I even got myself a set of piping tools for the cake decorations!

I'm definitely glad that i'm venturin into a new territory right now where there's so much for me to learn and i've got the time to spare as well. 

I've replaced some of the ingredients stated in the original recipe, so here's the revised recipe.

INGREDIENTS: 

2 cups all-purpose flour
1/2 cup sugar
3 tsps baking powder
1/2 tsp salt
1 egg
2/3 cup coconut milk
1/3 cup corn oil
1/2 cup coconut cream
1/2 cup dessicated coconut


TOPPING:
1/4 cup sugar
1/4 cup fresh grated coconut
1/8 dessicated coconut
1/2 teaspoon ground cinnamon

METHODS:

1) Combine the flour, sugar, baking powder and salt in a large bowl
2) Combine egg, milk,oil and cream in another bowl; mix well.
3) Stir egg mixture into dry ingredients just until combined.
4) Stir in coconut once batter is well combined
5) Grease or line paper muffins cups in the muffin pan and fill it two-thirds full. 
6) Combine the topping ingredients; sprinkle over batter.  Top it up with more desiccated      coconut if you want to beautify it.
7) Bake at 204 degrees C for 20minutes or until cake tester comes out clean.

I was happy how the topping turns out to be; crispy, just nice sweetness with a hint of cinnamon! Unfortunately i cant say much bout the muffin, it wasnt as moist and light as i would wanted it to be. I did some research and i found out the culprit so what i'm gonna do during my next  baking session would definitely bear in mind the tips given on muffin makin and try to follow as closely as possible.


Scrambled Tofu

Earlier on i was at a friend's place and i was jst browsin through for some recipes and i saw Scrambled Tofu, the site i was in was a Vegetarian and Vegan site and therefore the name Scrambled Tofu instead of Scrambled Egg.

I didnt click on it but i was curious on how would tofu taste like in a scrambled form. And my opportunity came when ive some tofu in the fridge and mom was outta ideas on wht she wanna cook. 

So i took the liberty to experiment with the ideas i have in mind. First, cut the Japanese egg tofu into 2cms of thickness and boil it. If you don’t like the smell of eggs in the tofu you can replaced it with the soy tofu for this recipe. Remove and let it cool in a bowl and roughly break it with a fork to look like scrambled egg. 

To make the sauce, i prepared some minced garlic, sliced red onions, chopped red bell pepper, cubed carrots, turmeric powder, cayenne powder, chicken stock granules, chopped coriander leaves, salt and sugar. 

Stir-fry the minced garlic and sliced red onions and when its golden brown, add in the cubed carrots then the red bell pepper. Add in some water and let it simmer then put in the scrambled tofu and season with turmeric and cayenne to your liking and lastly add in chicken stock granules, sugar n salt to taste.

Before you dish out, add in the chopped coriander leaves and give it a quick stir and serve while its hot. Since I was preparing it for the whole family, it wasn’t as spicy as I would want it to be. It will definitely taste better if there were more cayenne pepper powder in it.

Tuesday, January 20, 2009

Blueberry Muffins

This is my second attempt in bakin muffins and boy am i glad i got it right this time! Though there are still a lot of space for improvement but im so glad i got the basic done, at least the muffins rose unlike the previous one where it sunk in the middle, causin the whole muffin too sweet to consume.

I think i figure out why my first attempt in bakin failed miserably. i was too experimentive (not sure if there's such word), i substituted corn oil with olive oil! look at how crazy i can get. you cant blame me though, i dont have any corn oil at home and i dont wanna be using the cookin oil - palm oil. Perhaps there were more factors that contributed to the failure than the substitution of oil!

I learnt my lesson and in today's baking session, i used corn oil instead of olive. Previously i used a muffin mix, as the same as today's blueberry muffin. I thought i should start of with a muffin mix first then only i start from scratch once im familiar with baking. I cant wait till i bake next. Its gonna be from the scratch the upcoming ones.

Today i baked a dozen of muffins and i suppose i can bake more with a muffin pan with the same amount of batter. Talkin bout muffin pan, i was tryin to talk my mom into allowin me to get a few muffin pans and besides with that i can save on the muffin bakin cases. 

So with this muffin mix, all i added was corn oil, milk, eggs and blueberry paste. And it took me bout 45 minutes at bout 175 C. There was no written instructions on the temperature and the duration of baking so i was constantly checkin the muffins with the cake tester i bought earlier.

For display and food photography wise, i should at least frost the cake but i'm not a big fan of frosting and besides i think frostin would be good on cupcakes and not muffins. Muffins are less sweet than cupcakes otherwise its similar

Monday, January 19, 2009

Peanut Butter French Toast

Peanut butter has been my favourite since god knows when! This mornin when i got up, i had the craving for peanut butter; i love both the creamy and the crunchy ones. So i decided to make peanut butter french toast when i got home from running some errands. 

Despite havin a lil sore throat, i still insist on havin both peanut butter and black pepper at a go. I guess the temptations are too great to ignore. Besides who can ignore peanut butter & black pepper? Of course i'm referin to those avid fans of these two items. 

For the egg batter, i've had a good amount of black pepper in it. Usually i opt for coarse black pepper due to the texture and also the taste of it when you bite into it!

For those that want a lil saltyness to the combination u can either add a few drops of fish sauce or light soy sauce. Normally ppl would add a dash or two of light soy sauce instead of fish sauce. 

Fish sauce gives the egg a different taste and for those that wondered how come the eggs strips you had in a Thai restaurant taste differently or they have a certain distinctive taste to it ( a lil salty & aromatic hint), fish sauce's the secret.

Once you've got the egg batter ready, spread the peanut butter on a slice of bread or both slices if you want a thicker texture or if you want more melted peanut butter oozing out when you bite onto it. You can cut it in any way you desire but for me i cut it diagonally on both sides and ended up with 4 cute triangles.

Heat up the non-stick pan and glaze it with marjerin or butter then coat the triangles lighty with the egg batter. Do not let it soaked for too long for it will turn the bread soggy. You wouldnt wanna bite into a soggy bread would you? Then pan-fry the triangles on both sides and dish out onto a paper towel to absorb the excess marjerin.

Friday, January 16, 2009

Roti Jala - Lacy Pancakes

Lacy Pancake's one of my favourite when i was a lil girl till now! When i was lil i always wonder how do they make the pancakes look like that. Finally i had the opportunity to witness how a roti jala seller make a fresh batch of roti jala for the customers. I was amused by how that lil roti jala mold would be able to create such masterpiece. 

I never thought that one day i'll be makin my own lacy pancakes. Here's the list of ingredients you need to make this yummy lacy pancake. 

Lacy Pancake:

2 cups superfine flour
2 eggs
1/2 tsp salt2 1/2 cups of coconut milk
pinch of tumeric powder

This dish is usually taken with curry; chicken, fish, beef or even mutton. For lunch, i prepared two types of curry - chicken curry with potatoes and vegetarian curry, the Aloo Gobi style.

For those who has been followin this blog, i'm sure by know you know my style of cookin, yes, thats right, i dont give out the precise unit of measurement of the ingredients i used cuz i have no idea the exact measurement of the ingredients i have on my dish. Whenever i prepare somethin its all bout intuition on how much to put and everythin is to taste.

Chicken Curry

* Whole bird of chicken cut into bite size
* Marinate with salt and pepper for 4 hours or so
* Fry it 

Seasoning:

* Water or chicken broth
* Candlenuts (ground)
* Star anise
* Sliced onions
* Tamarind Juice
* Chicken stock granules
* Ground garlic + shallots
* Thin & thick coconut milk
* Salt and sugar to taste
* Cinnamon Stick ( since i dont have it, i used cinnamon
   powder instead)
* Curry leaves ( only leaves used)
* Curry meat powder ( mix with water & make
   it into a paste) 

First, fry the chicken and set it aside. Next, to make the gravy, stir fry the grinded garlic+ shallots, curry leaves, star anise, cinnamon stick, sliced onions. Add in the curry paste and stir fry till fragrant before adding the tamarind juice. I added some sugar before adding in the tamarind juice. Add in the thin coconut milk when the oil breaks and keep stirring and lastly before you dish out, add the pounded candlenuts and thick coconut milk and let it simmer. If the gravy is too thick to your liking, add water. Add sugar and salt to taste.

 Vegetarian - Aloo Gobi

* onions
* potatoes (cut into cubes)
* cauliflower ( cut into florets)
* curry leaves
* green chillies (cut diagonally) 
* tomatoes ( cut into cubes)
* curry powder
* tomato sauce
* brown sugar
* water

Overall i was happy how the lacy pancakes tasted but i definitely need more practice with the mold! Which means i'll be preparin roti jala for the family again and this time i'm determined to make the strands more fine and also a richer and creamier kind of curry to go with it.

Tuesday, January 13, 2009

Drunken Coriander Prawns

You must be wonderin why the name drunken coriander prawns? The word drunken is derived from one of the ingredients used in this dish and along with that i've inserted my favourite - coriander leaves! A lor of people dont fancy the taste nonetheless the smell of it. Both my bro and mom isnt a big fan of this herb. But me and my dad, we're both into zesty herbs.

I would say this is one of the easiest dish to cook. It doesnt require much ingredients and the cookin time is short as well. This dish is best to be cooked with the shell intact to give more flavour to the gravy. Since the prawns i have in the fridge are already shelled i've not much choice but to use it. 

For those who have the prawns in shells, do remember to trim the feelers of the prawns neatly with the kitchen scissors.

Ingredients you need would be : - medium-large prawns in shells , oil, sesame oil, minced garlic, finely shredded ginger. As for the sauce, you'll need chinese rice wine, salt and sugar chopped coriander leaves.

Heat wok with both types of oil, stir fry minced garlic and shredded ginger until fragrant. Stir in the prawns and fry a short while , add in rice wine and bring to boil.  Next, blend in sugar and salt to taste and add the chopped coriander and let it simmer for a while and dish out onto a bowl or platter. If you've slightly marinated ur prawns with salt then you can ommit adding salt into the sauce. 

My granny loves to have a lil more gravy with her rice so my version of the drunken prawns has a lil more gravy to it. If the taste of the gravy is too thick for you, do add in hot water to diluted the taste a lil.

Monday, January 12, 2009

Easy Egg Tarts

Egg tart's one of my fav desserts in the morning when i have dim sum. Come to think bout it, its not only during dim sum sessions but also when i visit the bakery! My personal favourite would be the Portugese Egg Tarts. I'll definitely look for the recipe to try it out. 

Since this is my first attempt in bakin egg tarts, i'm gonna start of with the easy egg tarts recipe i came across earlier. 

What you need for these egg tarts are:

Filling
* 2 eggs
* 200ml milk
*1/4 cup castor sugar
*1/2 tsp vanilla essence

Dough
*
80gm butter
*
21/2 cups flour
* 2/3 cup water

You'll need to preheat oven to 160 degrees C and beat all the ingredients listed in the filling.  Next combine butter , flour and water to make the dough.

If you've muffin pans then butter it with a brush. Roll out the dough to approximately 3mm thin. Next, you'll need to cut rounds of dough with an upside-down  cup to fit halfway up the muffin holes. As for me , since i dont have any muffin pans at home, i resorted  to round aluminium foils for my dough to sit in.

Pour the egg mixture through a strainer into each dough- lined up foil/muffin,leavin bout 5mm of rim.  Bake for 15 minutes. Turn up heat to 175 degrees for the lower part of the oven. Bake for another 6 minutes. Since i was using my good old-fashion oven, i baked it for bout 20mins.

The egg tarts turn out pretty but the crust was rather hard, perhaps its due to my own oven or mayb its the way i was doin the dough. I wasnt very happy with how the crusted tasted like but i suppose its aint that bad for a first attempt.

Anyhow, i'm planning to try out some other recipes for the dough. Perhaps i'll try to search for Betty Crocker Pie Crust Mix for the crust the next time around.
                                                              

Sunday, January 11, 2009

Kaya - Coconut Egg Jam

Today i was in the mood to get my hands dirty so i was just browsing around to see what's nice to make or cook. So i decided since i dont have all the ingredients i need for egg tarts, why dont i make Kaya instead. My family sure loves kaya, especially my granny.

To make kaya, its really really easy. You'll only need 4 ingredients ;
1) sugar
2) eggs
3) thick coconut milk
4) screwpine leaves aka pandan leaves.

What i did was, in a large bowl, i broke 7 eggs and pour in bout 300gm of sugar and mix it with a mixture at a low speed instead of hand whisking it.

When i was done with the eggs mixture, i cleaned the screwpine leaves and cut it to about 8 pieces in the lenght of 3cms each. Instead of knotting the leaves i chose to cut it for its easier to handle.

Next, i poured the eggs mixture and the screwpine leaves into a non-stick pan and stir it occasionally under a low heat. Once the sugar has dissolved, remove the non-stick pan from heat and pour in bout 250ml of thick coconut milk bit by bit while stirring it. Put back the eggs and coconut milk mixture on low heat and keep stirring for another 5mins then remove from the heat and strain the mixture into a double-boiler pot.

Since i dont have a double-boiler pot, i strained the mixture into a pot and place it in a pan of boiling water. Keep stirring the mixture until it thickens.

Once the mixture is to the thickness you desire, remove from heat and let it cool off before storing it in jam bottle.

For those who loves a darker shade of kaya, you can replace white sugar with brown sugar and caramelized it. If you want your kaya to be in greenish in colour, then add some pandan leaves juice/paste/essence.

The screwpine leaves i had in the egg/sugar mixture was to give the kaya a hint of the aromatic leaves.

Saturday, January 10, 2009

Steamed Char Siew Pau

Pau's one of my granny's favourite besides Loh Mai Kai. Since granny has been hinting for quite a while now that she wants some home made pau, i finally made some pau for her today.

This is my first time tryin my hands one pau making. I was lucky to have bought the char siew today at the market. Its all bout timing. If i were late for another 5mins, my char siew would have been other's char siew for the day. I wasnt sure of how much i should buy, so i told the butcher i want 1kg of it. Since he has a lil less than a kg on his tray, i told him i'll take the amount that he has.

I used only char siew as the filling. For those who are into making everythin from scratch, you can even roast your own char siew to be used as the pau's filling. You can add some green peas and chives or scallions to the filling. 

You'll need seasoning such as water, sesame oil, oyster sauce, sugar, dark soy sauce, cornflour, peanut butter,pepper and chinese cooking wine for the filling. 

First you'll need to mix all the seasoning together on a non-stick pan and stir on a low heat until the sauce thickens before adding the finely chopped char siew and for those who wants the green peas and chives/scallions, you can also add it in when you add it in chopped char siew.

As for the dough, i bought the pau flour from Blue Key (500gm,shifted) and added some other ingredients such as instant yeast (1/2 tsp), castor sugar (100gm), water (240ml), shortening (3tbsp) and  single- action baking powder (2tbsp) since i dont have double- action baking powder at home.

First, you'll need to knead the flour mixture into a smooth and elastic dough. Once u're done, cover it with a we cloth until the dough double its bulk.

After that, shift baking powder on the dough and knead well. Cover the dough and allow to rest for 15mins or so. Divide the dough into small balls, approximately 18, depending on the size of the portion. Fill up each small dough with about a tablespoon of filling and fold it.

Before putting it on a steamer, make sure that the water is boiling. Once the water is boiling, put the rack of pau on it and steam for approximately 10-15mins.

Though the result isnt exactly what i was hoping for but i'm glad it didnt turn out to be a disaster! After steaming the pau, there's brown dots all over the pau. Not sure why not. Mom said it might be the yeast , but since i used the instant yeast , there's no need to mix it with water. Perhaps i can mix it and dissolve it in the water first before addin it to the flour mixture. The brown dots made my pau looks like its wholemeal pau! I'll definitely give it a few more try until i achieve like the ones available at the dim sum place, so white and fluffy!

Edited :

I found out why there were brownish spots on the pau skin. Its due to the lack of the very well kneading of dough after adding the baking powder! Lesson learnt, next time around, a well kneadin is needed for the brownish spots to disappear!

Friday, January 9, 2009

Tangy Mango Slaw

Like i mentioned yesterday, i'll get my hands on the pie tee mold and make some decent looking shells but i wasnt in the mood to test out my patience , so i embarked in this new recipe. 

This is actually the recipe meant to be my new filling (the modern vegetarian filling i mentioned) for the pie tee. 

Instead of eatin it together with the pie tee shells, i decided i should jst eat it like a salad. Besides havin it as a salad, u can use it for a side dish to a pasta, chicken or even seafood dish.

Mango slaw is one really easy recipe. All you need is one shredded  firm ripe mango, shredded cucumber, shredded carrot, slices of red onions, shredded or thinly sliced red bell pepper (capsicum) and some chopped coriander leaves.

For the dressing, its a simple vinaigrette. Usually vinaigrette's a mixture of vinegar and oil with some flavoured herbs, spices and other ingredients.

Instead of vinegar, i used lemon juice with some honey, a dash or two of black pepper and a pinch of salt.

For those who loves honey, you can put more of it to tone down the tartness of lemon juice.

To get a more flavourful salad, leave it a lil longer after mixing it in the salad bowl. The shredded vegies will absorb all the tangy-ness and you'll have a less raw taste to the green vegie. This is most suitable for those who do not fancy capsicum or fresh onions.

For those who wants more stuff in it , you can put it some shredded cabbage/purple cabbage, pineapples, mandarin oranges, you name it. 

The more colourful ur platter is the better!


Top Hats - Pie Tee

Today i got the Pie Tee mold i ordered and to be honest i was eager to try it out and see if i can get the pie tee cases/shells like how some restaurants served it.

I thought it would be easy but i was so dead wrong! There are rules to follow though. For instance, ur mold cannot be to hot and it should not sizzle when its dipped in the batter. It might sound really easy but i had a tough time doin it and i wasted quite a bit of batter experimentin on how to do it and get it right.

At last i manage to get one miserable shell after a long try. Of course the test didnt just stop there, i couldnt get a proper one after that! The mold was too hot and when i dipped it in the batter, it sizzled! So again, i wasted more of the batter.

But at last i managed to get a few decent lookin shells but the bottom part of the shell isnt exactly flat. I'm still wonderin on how do they get it to look that flat.

Despite so many failed attempts, I'll be tryin to make those shells again tomorrow. I'm feelin rather dissatisfied today but hopefully tomorrow's attempt will be a successful one.

As for the pie tee fillings, i used shredded jicama (yam bean), shredded carrot, finely chopped french beans, finely chopped garlic, fresh prawns (chopped into smaller pieces), salt, sugar, oyster sauce and some chicken stock granules.

You can actually put anythin as the fillings. For those who loves mushroom, you can add it in but do slice it finely for it will fit into the shells. I've tasted some with deep-fried beancurd in it as well. So basically you can get creative with the fillings. 

Talking bout fillings, since i'm gonna try making the shells again tomorrow, i'll have a slight idea for the fillings - it will be a vegetarian filling and a modern one too!

Besides the fillings, you'll need the toppings too. Again its all bout creativity. You can have anythin as the toppings. You can even prepare a few toppings and voila a range of combinations will be formed!

As for me, since i couldnt get the scallions today and i dont quite fancy fried shallots with it, so i only had shredded omelette and a dash or two of Sri Racha hot chili sauce. 

For those who loves a lil raw green, u can add shredded cucumber on it too and perhaps a lil finely chopped onions as well.

Here are some miserable shells that i managed to make. So stay tune for a better lookin shells. Am gonna make sure this time i get it right. 

Told a friend i did this and he told me its a very hard process. Oh well, be it hard or easy, am gonna fine tune it to perfection.

Wednesday, January 7, 2009

Old Fashion Oven Chicken

You must be wondering what's this old fashion oven huh? Well, its actually my mom's or perhaps my granny's. My family members dont bake or have the interest in any oven-related stuff so there's not a need to have an oven at home.

Being somewhat curious on whether that old-fashion oven i have at home,stored somewhere in the house might be of use, i took it out and tested it by hittin the switch and wait too see if it warms up. To my surprise it warmed up and im more than glad to start making full use of it. 

Previously i bought a dozen of drumsticks and i've had half of it turned into Lemony Chicken so i thought i might as well marinate the rest overnight and cook it today. Well i'm totally clueless on wht i should be cookin with that old-fashioned oven. Why? It has no temperature control knobs on it and i have no idea how high is the celcius scale when u hit the switch and leave it on. 


So wht i did was i heated the oven for bout 10mins or so and then i lined the rack of the oven with the marinated chicken drumsticks.

Since i marinated the drumsticks im sure there will be sauce dripping from it so i placed a round flat metal place below for the drippings to be collected.

After about 15mins or so, i went to check on the drumsticks and it looks good to me, not exactly the roasted kinda look i was hoping for but it was good enough, at least the drumsticks are on its way to perfection. So i brushed a lil of the left over sauce from the marination of each of the drumsticks and closed the oven.

The next time when i went to check on it, i brushed more of the sauce on it and 10mins after that, i turned the drumsticks around and left it for another 10mins or so then went back to brushed the remainin sauce on it. 

After 10 mins, i went back to check on it and this time it looks like its done. So i dish it up and brushed it with the remainin sauce on the flat metal plate i had below the rack.

As for the marination, i had quite a bit of seasoning in it. I've had sesame oil, maggie seasoning, sweet sauce soy, light soy sauce, oyster sauce and pepper in it. These combination might be a lil salty so be careful with the measurement used.

Before i marinated the drumsticks, i used a fork to make holes on the drumsticks so that when you marinate it , it will get a fuller flavour. Its best to keep it marinated over night.

Tuesday, January 6, 2009

China Arrowheads

Arrowheads (Ngaku) also known as Chinese potato or swamp potato since it grows in the water is a seasonal vegetable  as it is only available during the CNY celebration.

Its been weeks since i've seen people flockin around the arrowheads' baskets in the market or the hypermarket. I suppose the sight of those people standin around and pickin the best ngaku from the basket got the better of me and soon i was one of them! When i was there, perhaps i was early, i was the only one standin there and takin my own sweet time pickin the best available ngaku of the bunch. 

Before this, I've tasted ngaku but i've no idea how it looks like until i did some research on it. i've tried ngaku crisps, the crisps are addictive, crunchy and tasty; once you start munching on it , its hard to stop!

I've not personally made the crisps before, so i thought why not get some back home and see wht else i can do with it besides fryin it. 

I bought a packet of it, roughly bout 600gm or so. Wanted to get more but told myself i can go back and get more if i need them. The uncleaned version of it was rather dirty, so when i got home, i cleaned off the dirt and left it aside until im ready to use it. I divided the ngaku into two portions. One for the crips and the other for stir-fryin. I heard that ngaku was originally stir-fried with pork during CNY celebration. 

The ngaku crisps are really easy to make. All you need to do is to peel the skin of the ngaku and slice it. You can either use a shredder to do so or the traditional way where u slice each and every one of it.

For me, i sliced bout 3/4 of it using a shredder and the rest i do it the traditional way for i dont have defying fingers and also i dont plan to injured my thumb again, after twice cutting myself on the same spot by a shredder!

After slicing it, i pat dry it with kitchen towel to absorb the excessive water to prevent the "fightin" session between the oil and the water. Spluttering of oil can get pretty dangerous and you might just get hit in the eye area! 

Heat oil in the wok or non-stick pan like in my case and when its hot enough, drop the sliced ngaku and when it turns brown scoop it up and drain in absorbent paper.

For those of you who like it a lil salty, you can add fine salt over chips. Shake to mix it evenly and you can store it in an air-tight container or glass bottle.

Once i was done with the crisps, i cut the rest of it into 1/8 instead of 1/4 which is rather a big chunk. I've no idea on what to stir fry it with, i didnt want it to be with soy sauce again so i thought why not add in some curry powder to it. The only available curry powder at home was the meat curry powder so i've no choice but to use that. 

For this dish, i used curry leaves, minced garlic, sliced onions, marinated minced pork (soy sauce & pepper), chicken broth, sweet soy sauce, curry powder and lastly the arrowheads.

First stir-fry the garlic then add the onions then the curry leaves, minced pork and leave it in a while and add it curry powder and continue stirring it. Add in a lil chicken broth and let it simmer for a while and add in sweet soy sauce and stir fry a lil while more and the dried curry ngaku's ready to be served.


Monday, January 5, 2009

Lemony Chicken Drumsticks

I was browsing through and i saw this recipe with Lemon Chicken as the name. It sure does sound interesting to me. Besides this, I've this friend who's  a Canadian told me that there's this chinese restaurant that he patronises served Orange Chicken and i thought to myself, why not experiement on lemon first and next i'll move on to orange? 

So today i did the lemon version. Well i wanted it to be spicy lemon chicken but it didnt quite turn out that way. Perhaps the coating powder i used wasnt as spicy as i expect, perhaps i should add in more chilli powder in it.

I marinated the chicken with rice wine, light soy sauce and egg yolk for a few hours n just before fryin, i coated the drumsticks with the spicy fryin powder i bought and set it aside for bout 5-10 mins to avoid the oil from lookin cloudy. 

As for the sauce, i used freshly squeezed lemon juice, some grated rind of lemon, chicken broth, soft brown sugar ( i used both the soft brown sugar and honey) and some cornflour to thicken the sauce. It has jst the right amount of tartness for me but it was a lil too lemony for mom n granny's like. For those who like it on the sweet side, feel free to experiment on the sugar or honey added in, also a more concentrate chicken broth is also good. My chicken broth was kinda deconcentrated so perhaps due to that the sauce is more tangy than it should be.

Next time around, am definitely gonna try a different cookin method in preparing this dish. Pan- fryin and replacing the drumsticks with strips of breast meat minus the rice wine and more chilli powder might jst give this dish more kick to it. Mayb i can try it out on my next project - Orange Chicken, for i've 6 more drumsticks left in the fridge. 

 
Technorati Profile